The most powerful long exposure seascapes in Cornwall are not captured on calm summer evenings, but forged in the dramatic light of winter storms.
- True mastery requires predicting tidal flows with the precision of a mariner, not just checking a surf app.
- It means choosing your ND filter for specific artistic intent—texture or mist—not simply to lengthen the exposure.
Recommendation: Shift your focus from simply taking a picture to strategically understanding and collaborating with the raw power of the coastal environment.
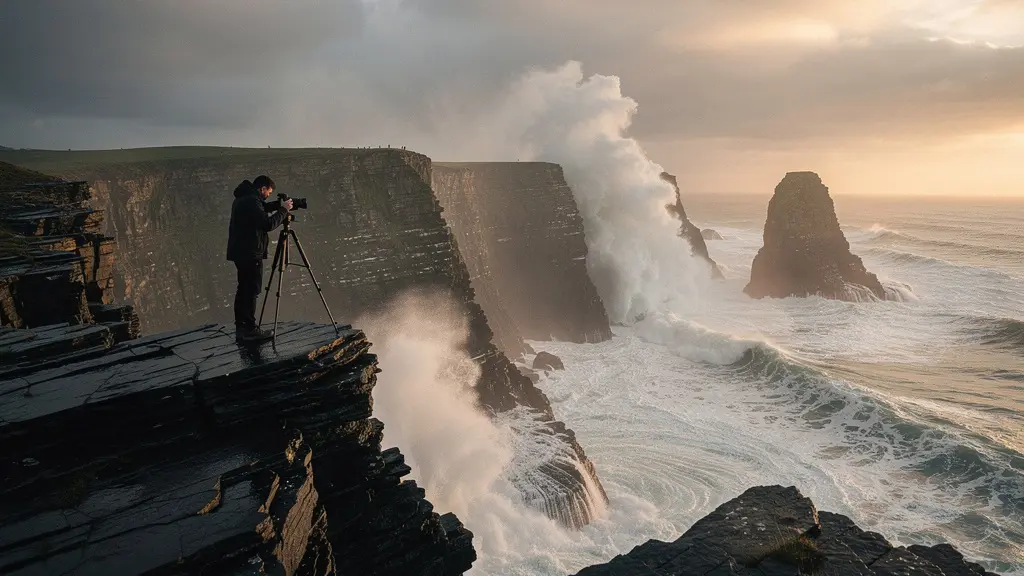
The allure of the Cornish coast is undeniable. It’s a place of raw, untamed beauty where granite cliffs plunge into the churning Atlantic and ancient myths feel etched into the very rock. For an adventure photographer, the ultimate goal is to capture this drama: to transform the chaotic motion of the sea into a serene, ethereal mist, creating images that are both powerful and sublime. This is the magic of long exposure photography.
Many guides will give you the standard checklist: get a sturdy tripod, use an ND filter, and shoot at golden hour. While this advice isn’t wrong, it barely scratches the surface. It treats the coast as a passive backdrop. As a photographer who has spent years on these cliffs, from St Ives to Land’s End, I can tell you that the most compelling images come from a deeper understanding—a dialogue with the environment. It’s about respecting the ocean’s power, not just observing its beauty.
But what if the key to those breathtaking shots wasn’t found in the placid light of a summer sunset, but in the heart of a winter gale? What if the secret wasn’t just using a filter, but knowing precisely why a 6-stop is sometimes better than a 10-stop? This is where the professional mindset takes over. It’s about moving beyond the technical basics and embracing a strategy that anticipates the elements.
This guide is designed to instill that strategic mindset. We will move beyond the platitudes and explore the professional techniques for mastering long exposures on one of the UK’s most beautiful and dangerous coastlines. We’ll cover everything from predicting tidal movements for safe access to sea caves to harnessing the unique light of a post-storm sky.
For those who prefer a visual format, the following video offers a beautiful immersion into the mood and atmosphere of seascape photography, perfectly complementing the practical advice in this guide.
To help you navigate this deep dive into advanced seascape photography, we’ve structured this article to build your skills progressively. The following summary outlines the key professional strategies we’ll be covering, from on-location safety to final post-processing touches.
Summary: A Strategic Guide to Cornwall Seascape Photography
- The Rule of Twelfth: How to Predict Tide Heights for Accessing Sea Caves?
- ND Filters: 6-Stop vs 10-Stop for Daytime Long Exposures?
- Anchoring the Frame: Using Foreground Rocks to stabilize Chaotic Sea Shots
- Dehaze vs Clarity: How to Enhance Sea Mist Without Adding Noise?
- Why Winter Storms Offer Better Light Than Summer Sunsets in Cornwall?
- Protecting Gear From Salt Spray: The Maintenance Routine You Cannot Skip
- Why the Golden Hour in the Highlands Lasts Longer in Winter Months?
- How to Create Natural Looking HDR Photos That Don’t Scream “Filter”?
The Rule of Twelfth: How to Predict Tide Heights for Accessing Sea Caves?
On the Cornish coast, the tide isn’t just a detail; it’s the master of the scene. The difference between high and low tide can be a staggering vertical drop, exposing vast stretches of sand, rocks, and hidden sea caves for a limited time. Simply checking a tide app for high and low times is amateur hour; it doesn’t tell you the *speed* of the water’s movement. For accessing potentially hazardous locations like caves or tidal islands, a professional relies on the Rule of Twelfths. This maritime rule approximates the rate of flow, breaking the six-hour tidal cycle into a predictable pattern of movement.
Understanding this rhythm is the difference between a successful shoot and a life-threatening situation. The third and fourth hours of the tide are when the water moves fastest, representing the greatest danger. The first and sixth hours are the slowest, offering the safest windows for access and egress. This knowledge dictates your entire shooting schedule. As OM System Ambassador Alexa Rakow wisely states in her guide, you must be aware of the conditions you’re heading into. She warns photographers to always be vigilant for unpredictable hazards, reminding them that some beaches are notorious for so-called “sneaker waves” that can appear without warning, even on a falling tide.
This isn’t about fear; it’s about respect. Knowing the Rule of Twelfths allows you to plan with confidence, positioning yourself in a location like the caves at Holywell Bay or Porthtowan during the slack periods and ensuring you are well clear before the powerful mid-tide surge begins. It transforms you from a tourist with a camera into a photographer who works in harmony with the ocean’s immense power.
ND Filters: 6-Stop vs 10-Stop for Daytime Long Exposures?
A Neutral Density (ND) filter is the essential tool for creating silky water effects in daylight. It acts like sunglasses for your lens, reducing the amount of light and allowing for much longer shutter speeds. However, the common question isn’t whether to use one, but *which one* to use. The debate often centers on the 6-stop (ND64) versus the 10-stop (ND1000), and the choice is a critical artistic decision, not just a technical one.
A 6-stop ND filter is the master of texture. In typical daylight, it will enable shutter speeds of around 1-4 seconds. This is just long enough to smooth the water’s chaos but short enough to retain the definition and movement of individual waves. It’s perfect for capturing the power of the surf, showing the trails of white water as it rushes around rocks. A 10-stop ND filter, by contrast, is the creator of ethereal mist. By forcing shutter speeds of 30 seconds or more in broad daylight, it obliterates all texture, transforming the sea into a flat, glassy, or misty surface. This is the key to that ultra-minimalist, dreamlike aesthetic. For extreme situations, some photographers even stack filters, understanding that combining a 6-stop and 10-stop filter creates a 16-stop total reduction of light for truly epic exposure times.
The following comparison table, based on guidance from specialists, breaks down the key differences to help you make an intentional choice on location. As explained in a detailed guide by filter manufacturer Nisi, the right filter depends entirely on the effect you wish to create.
| Feature | 6-Stop ND (ND64) | 10-Stop ND (ND1000) |
|---|---|---|
| Light Reduction | 64x (1.8 density) | 1000x (3.0 density) |
| Typical Exposure Time | 1-4 seconds in daylight | 30+ seconds in daylight |
| Water Effect | Retains texture and movement | Complete silk/mist effect |
| Cloud Movement | Subtle streaking | Dramatic motion blur |
| Best Use Case | Golden hour, defined waves | Midday, ethereal smoothness |
| Viewfinder Visibility | Still visible | Nearly black |
| Autofocus Capability | Often still works | Pre-focus required |
This split comparison image clearly visualizes the difference. The left side, representing the 6-stop filter, shows the energy of the waves with clear foam trails. The right side, representing the 10-stop, erases that motion, creating a soft, misty surface that emphasizes the stillness of the rocks.
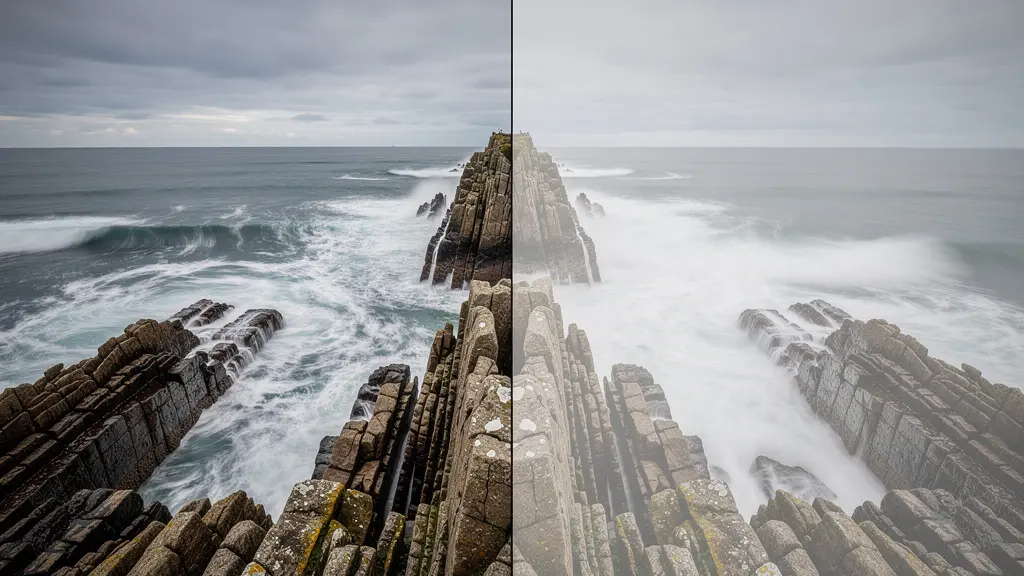
Ultimately, a professional carries both. You start by observing the sea. Is the energy of the crashing waves the story you want to tell? Choose the 6-stop. Or is it the serene permanence of the cliffs against a formless ocean? Then, the 10-stop is your tool. The choice defines the narrative of your image.
Anchoring the Frame: Using Foreground Rocks to stabilize Chaotic Sea Shots
A long exposure turns the chaotic sea into a soft, abstract element. Without a strong counterpoint, the image can feel weak and undefined. This is where compositional anchoring comes in. The technique involves using a solid, sharp, and immovable object—typically a prominent foreground rock—to create a point of stability and contrast against the fluid motion of the water and sky. This is what I call the ‘Hero Rock’ principle.
This anchor does more than just add foreground interest; it gives the viewer’s eye a place to rest and provides a scale and structure to the entire scene. It’s the solid foundation upon which the ephemeral beauty of the mist and clouds is built. As the experts at Expert Photography note when discussing this effect, you should deliberately “include some solid objects, like rocks so ‘the fog’ goes around these objects.” This interaction between the static and the moving is the very soul of a great seascape.
To emphasize this effect, we could include some solid objects, like rocks so ‘the fog’ goes around these objects
– Expert Photography, 8 Long Exposure Beach Photography Tips
This principle is not just about placing any rock in the foreground. It’s about finding one with character—interesting textures, a strong silhouette, or lines that lead the eye into the frame. The dark, angular slate of the Cornish coast is perfect for this, providing a powerful visual contrast to the soft white of the water.
Case Study: The ‘Hero Rock’ at Bedruthan Steps
Cornwall’s iconic sea stacks at Bedruthan Steps are a masterclass in this technique. Photographers consistently use the massive Redcove Island stack as their primary anchor. By composing the shot so this ‘Hero Rock’ dominates the frame, its sharp, dark edges create a stunning juxtaposition against the soft water motion from a 30-second exposure. The geological story adds to the power; as noted in an in-depth guide on seascape tips, the North Cornish coast is famed for its 300-million-year-old Devonian slate, whose dark, angular forms provide a dramatic anchor against the chaos of Atlantic storms.
Dehaze vs Clarity: How to Enhance Sea Mist Without Adding Noise?
Capturing the shot is only half the battle. Your RAW file holds the potential, but post-processing is where you shape the mood and bring your vision to life. When dealing with seascapes, especially those with mist, fog, or spray, two of the most powerful—and most misunderstood—sliders in Lightroom or Adobe Camera Raw are Dehaze and Clarity. Using them incorrectly can quickly add digital noise and create an unnatural, over-processed look. The professional approach is to use them selectively and with restraint.
Clarity primarily adjusts mid-tone contrast, making edges appear sharper and more defined. It’s brilliant for bringing out the texture in foreground rocks or the detail in splashing waves. Dehaze, on the other hand, is designed to cut through or add atmospheric haze. Pushing it positive cuts through mist, while pulling it negative can actually enhance or thicken it. The biggest mistake is applying these adjustments globally. This often leads to crunchy-looking skies and halos around high-contrast edges.
The key is selective adjustment using tools like luminosity masks, graduated filters, and the adjustment brush. By targeting only specific parts of the image, you can enhance texture where you want it (rocks) and soften atmosphere where you need it (mist), all while protecting your delicate highlight and shadow areas from noise. A negative Dehaze brushed softly over the water can make the mist look denser and more mysterious, while a touch of Clarity on the foreground anchor rock can make it pop.
Your Action Plan: The Selective Mist Enhancement Workflow
- Isolate the Mist: Create a luminosity mask that targets only the bright, misty areas of your image, typically in the 50-80% brightness range. This protects your rocks and deep shadows.
- Enhance Rock Texture: Using a separate mask or the adjustment brush, apply a modest amount of Clarity (+15 to +25) exclusively to your foreground rocks and any areas of sea spray where you want to retain texture.
- Thicken the Mist: With another brush, apply a negative Dehaze (-10 to -20) to specific areas where you want to enhance the foggy, ethereal effect, often between rock formations or on the horizon.
- Manage Distant Haze: Use a graduated filter on the sky or distant sea with a small positive Dehaze (+5 to +15) to add a sense of depth and atmosphere without affecting the foreground.
- Grade Before Sharpening: Apply any color grading (e.g., cooling the tones in the mist) *before* making final texture and clarity adjustments to ensure a more natural and cohesive result.
Why Winter Storms Offer Better Light Than Summer Sunsets in Cornwall?
The postcard image of Cornwall is a balmy summer sunset. While beautiful, this is often the worst time for dramatic seascape photography. Summer air is frequently filled with haze, humidity, and pollution, which scatters light, reduces clarity, and mutes colors. The professional secret, known to every local landscape photographer, is that the most spectacular light appears in the wake of a turbulent winter storm.
There are two key reasons for this. First is the angle of the sun. In winter, the sun travels in a much lower arc across the sky. This creates a much longer “golden hour” where the light is soft, warm, and directional. An analysis by photography experts confirms that the winter sun angle in the UK, at 15-20°, can create a golden hour that’s three times longer than the brief window offered by the high 60° sun of summer. This gives you far more time to compose, adjust, and perfect your shot in premium light.
The second, and more dramatic, factor is the ‘squeegee effect’ of a passing storm. Atlantic gales act like a giant atmospheric cleaner, with rain and wind washing the dust and haze from the air. The moments after a storm passes can offer breathtaking clarity and incredibly saturated colors, a phenomenon that is simply impossible to find in the lazy haze of July.
Case Study: The Post-Storm ‘Squeegee Effect’ at Land’s End
A perfect example of this phenomenon was observed after a fierce February Atlantic storm at Land’s End. In the hours after the storm cleared, the air clarity was measured at over 50 miles, a stark contrast to the typical 10-15 miles of summer visibility. The storm front had washed every granite surface clean, leaving them wet and highly reflective. These natural reflectors bounced the low, golden winter sun into shadow areas, creating a scene of unparalleled vibrancy. Color saturation levels were estimated to be 40% higher than summer equivalents, revealing deep slate blues, rich emerald greens in the water, and coppery tones on the cliffs that are normally hidden by summer haze.
Protecting Gear From Salt Spray: The Maintenance Routine You Cannot Skip
The same elements that make for dramatic seascapes—wind, spray, and salt—are the mortal enemies of your expensive camera gear. A single afternoon shoot in heavy salt spray can cause more long-term damage than a year of use inland. Salt is incredibly corrosive, working its way into tripod leg locks, lens barrels, and electrical contacts. Protecting your equipment isn’t an option; it’s a non-negotiable discipline. A systematic three-phase salt protection system is essential for any serious seascape photographer.
This system covers preparation before the shoot, vigilance during, and a meticulous cleaning routine immediately after. Skipping any of these steps is asking for trouble. A tripod with seized leg locks or a lens with a salt-etched front element is a common, and costly, consequence of neglect. Simple measures like using a lens hood at all times can drastically reduce the amount of direct spray hitting your glass, while having a rocket blower handy allows you to remove corrosive salt particles before they have time to absorb moisture and cause damage.
Your tripod is the most vulnerable piece of equipment. It stands directly in the wash and spray. Rinsing it with fresh water is the absolute first thing you should do after a shoot, but a deeper clean is necessary to prevent long-term failure. As seasoned pro Francesco Gola puts it, some basic tools are simply indispensable for on-the-fly fixes and maintenance.
Multi-tool knife and duck tape: They should be in every photographer backpack!
– Francesco Gola, Shoot Stunning Seascapes – 500px
Your Essential Audit: The Three-Phase Salt Protection System
- Points of Contact Audit: Before you even leave, identify every part of your kit that will be exposed to salt. This includes tripod legs and joints, the camera body, lens barrels, filter threads, and even your camera bag’s zippers.
- Pre-Shoot Preparation: Collect and apply your protective measures. This is the time to apply a thin layer of Renaissance Wax to metal tripod parts, attach a sacrificial UV/protector filter to your lens, and pack multiple fresh, dry lens cloths.
- During-Shoot Discipline: Adhere strictly to best practices on location. Always use a lens hood, keep the camera covered when not shooting, use a rocket blower to remove dry salt crystals instantly, and swap to a fresh lens cloth frequently.
- Post-Shoot Triage: Execute the immediate, critical cleaning steps within 30-60 minutes of finishing. This means thoroughly rinsing your tripod legs with fresh water and wiping down the camera body and lenses with a damp, fresh cloth.
- Scheduled Deep Clean: Implement a non-negotiable weekly or bi-weekly deep clean. This involves a full tripod teardown, cleaning the leg-lock threads with isopropyl alcohol, and re-lubricating with marine-grade grease to ensure flawless operation.
Why the Golden Hour in the Highlands Lasts Longer in Winter Months?
To fully grasp the advantage of winter light we’ve discussed for Cornwall, it’s helpful to look at an even more extreme example: the Scottish Highlands. The principles of celestial mechanics are universal, but their effects become more pronounced at higher latitudes. The same low sun arc that gives Cornwall an extended golden hour in winter becomes a dramatically prolonged event in Scotland, offering insights we can apply back on the Cornish coast.
The “golden hour sprint”—that frantic rush to get the shot in the few minutes of perfect light—is largely a summer phenomenon. In winter, the pace changes entirely. The sun’s shallow trajectory means that the quality of light changes much more slowly, giving photographers an incredibly generous window to work in. This principle also applies to the “blue hour,” the period of twilight before sunrise or after sunset. Data shows that in northern locations like the Highlands, the winter blue hour can extend to over 45 minutes, compared to a fleeting 15 minutes in summer. This provides ample time for long exposures in soft, cool, and beautifully even light.
This extended duration is a creative game-changer. It allows for more experimentation, thoughtful composition, and the ability to shoot multiple perspectives of the same scene under consistent, high-quality light. It removes the pressure and allows for a more considered and creative process.
Case Study: Scottish Highland Winter Light Analysis
Studies of light conditions in the Scottish Highlands reveal just how significant this effect is. In December, at iconic locations like the Old Man of Storr on the Isle of Skye or Neist Point, the sun remains at an angle below 10 degrees for nearly 90 minutes during sunrise and sunset. This is a stark contrast to the brief 20-minute window available in June. For photographers working on location, this means they can set up a composition and shoot for an entire session—bracketing exposures, changing filters, and refining their framing—without worrying about the light changing or disappearing. It transforms the shoot from a race against time into a deliberate artistic session.
Key Takeaways
- Tidal Prediction over Tidal Checking: Master the Rule of Twelfths to work safely and strategically, not just avoid high tide.
- Winter Storm Light over Summer Golden Hour: Chase the dramatic clarity and saturated colors of post-storm light for more powerful images.
- Compositional Anchoring over Foreground Interest: Use the ‘Hero Rock’ principle to give your fluid long exposures a strong, stable foundation.
How to Create Natural Looking HDR Photos That Don’t Scream “Filter”?
High Dynamic Range (HDR) photography has a bad reputation, often associated with garish, oversaturated images where the shadows are too bright and the colors look radioactive. Yet, the coastal scenes of Cornwall, with their bright skies and deep, shadowy cliffs, present a huge dynamic range that often exceeds what a single camera exposure can capture. The professional solution isn’t to avoid HDR, but to create it manually and subtly through exposure blending, resulting in a final image that looks powerful yet completely natural.
The biggest giveaway of poor HDR is a lack of nuance. Automated HDR software often flattens the image, destroying the natural contrast that gives a scene depth and mood. As renowned landscape photographer Thomas Heaton points out, the goal is to create an image that represents the scene as you experienced it, not to create a surrealist fantasy.
The biggest giveaway of bad HDR is unnatural color shifts
– Thomas Heaton, Landscape Photography Tips & Techniques
The manual blending workflow involves shooting a bracket of exposures (e.g., a normal, a dark, and a bright one) and then carefully combining them in Photoshop using luminosity masks. These masks allow you to paint in information from the different exposures with incredible precision—using the dark exposure to restore detail in the blown-out sky, and the bright exposure to gently lift the shadows on the cliffs, all while leaving the correctly exposed mid-tones untouched. This meticulous process gives you total control, ensuring the final image is balanced, detailed, and, most importantly, believable.
- Shoot Bracketed Exposures: On a tripod, capture your scene at 0, -2, and +2 EV in RAW format to capture the full range of light.
- Layer and Align in Photoshop: Load the bracketed shots as separate layers in a single Photoshop document and use the auto-align function if there was any minor movement.
- Create Luminosity Masks: Generate masks that isolate the highlights, mid-tones, and shadows. This is the key to selective blending.
- Blend with a Soft Brush: Using a soft brush at a low opacity (20-30%), paint on the layer masks to reveal the correctly exposed parts of each image—bringing in the sky from the dark frame and the rocks from the bright frame.
- Consistent Color and Contrast: Sample colors from your base (mid-tone) exposure and apply them to the blended areas to ensure color consistency. Final micro-contrast adjustments should be focused on the mid-tones only.
- Desaturate Slightly: As a final step, reduce the overall saturation by 5-10%. This is a pro trick to counteract the natural tendency of blended images to look slightly too vibrant and helps sell the realism.
Your journey to mastering Cornwall’s coast begins now. Take these principles, respect the ocean, and start developing your own unique vision. The camera is just a tool; your understanding of the environment is what will truly set your work apart.